Bicycle Frame Refinishing

|

Paint gets chipped, scratched and worn. Defects in paint allow corrosion, which can weaken a frame.
If a frame is refinished before there is serious damage, you can get many more years of use out of it.
How much of the work does it make sense to do yourself? With a steel frame, there are several good answers, depending on available time, your workspace, and how much the appearance of the frame matters to you.
With non-steel frames, options are more limited, but I'll describe them too.
Professional bicycle framebuilders and refinishing shops do fancy, multi-color paint jobs and complete restorations, even reproducing original decals, striping and chrome. If you'll be satisfied with a simpler appearance, an industrial refinishing shop or auto-body shop can do excellent work at a lower cost. I'll also describe a do-it-yourself paint job which results in an ugly but very durable finish.
But -- 90% of the work of refinishing is in the preparation. With a bicycle frame, much of this work can be accomplished with ordinary bicycle tools and other simple tools and supplies, though final preparation for painting is best handed over to a professional. Once preparation is complete, you may have the frame professionally refinished, or give it the ugly finish I mentioned.
The main example here is a home-built steel tandem frame made from junk frames. (I described the construction of this frame in another article.)

The photo at the left shows the tandem frame before I prepared it for refinishing. It still carried most of the original paint, though I had cleared paint off some areas before brazing. The frame had been in storage for a few years before I got around to refinishing it, and there were some rust patches on the bare-metal areas.
The first step in preparation is to strip a frame of all components -- already done for this frame before I brazed it together. Most components come off easily. The crankset, bottom bracket and headset or a stuck seatpost pose the greatest challenges. Articles on this site describe how to deal with them:
Keep small parts in order, for ease in replacing them. It's good to string nuts, bolts and washers of each component on a spare cable or spoke.
Any modification that involves brazing or welding has to be done before final preparation for refinishing. If you are going to re-space the dropouts, now is a good time too -- but first, check that the frame is sound -- no cracks or serious dents, and tolerable rust. Tubes of steel frames can be replaced -- worth doing for a collector's item -- work for a pro framebuilder.
Three degrees of rusting are, more or less, light surface rust, moderate pitted rust, and rust which is so serious that the frame needs repair. Some pitted rust is tolerable in low-stress areas of the frame.
Rust is common in the bottom-bracket and chainstay area, or wherever paint is damaged -- also, due to sweat, on the top side of the top tube if a bicycle has been used on an indoor trainer.
Look inside the tubes for rust too. Inside rust is insidious rust. Water can enter through the open top of a plain-tube seatpost, or through a ventilating hole.
If the frame doesn't have a drain hole under the bottom bracket, drill one. This will help to prevent internal rust in the future. The down tube, seat tube and chainstays all should communicate with the bottom-bracket shell, so they drain through this drain hole. There should preferably be no pockets where water can collect.
An advanced case of internal rust -- my old Raleigh Twenty folder frame.
Salt water entered at a ventilation hole (blue arrow) and couldn't get out
because paint blocked the lower ventilating hole (my bad!).
The tube rusted from the inside and split (red arrow).
Primer under the paint prevented rust in small scrapes (green arrows).
The hinge rusted where large areas of paint were scraped off (orange arrow).

Sand rust patches lightly with fine sandpaper -- #320 grit or finer. This reveals where there is deeper rust. Also peel off decals. A paint scraper or single-edged razor blade makes quick work of them..
Follow the sandpapering with a solution of phosphoric acid -- the mild acid which gives Coca-Cola its tang. In fact, sometimes Coca-Cola has been used to clean metals. (I don't recommend Coca-Cola for rust removal: it leaves a sticky residue, and the acid concentration is low.)
Phosphoric acid eats rust but not steel, and you can leave a rusted part  of a frame soaking until all the rust is gone. Avoid getting phosphoric acid solution into your eyes; also, rubber gloves are advisable -- but short-term contact is harmless. You need only wash with soap and water.
The photo at the right shows two phosphoric acid products. Loctite Naval Jelly is pink and gooey and will stick to surfaces at any orientation. Better hardware stores carry this product. Purple Power rust remover or another watery phosphoric acid treatment is typically used as a wash for metal panels in auto-body shops. You can brush this onto bare metal parts of the frame to remove light surface rust and prevent further rusting, or you can soak parts of the frame in a diluted solution to remove deeper rust. One useful way to soak is to saturate a rag with the solution and wrap it around a frame tube. [Note: as of 2019, it appears that Purple Power De-Ruster is no longer sold, but another company, Klean-Strip, offers a similar product. See the link at the end of this article.]
Phosphoric acid may slowly eat brass, so be careful about using it on brazed joints. Usually, the rust will be gone before there is any significant damage to the brazing.
The object is to remove rust right down to bare metal. You should see only gray, no brown or orange rust. The frame may be left with rust pits. If they are not too deep and not located where they weaken the frame, good enough. They can be filled before painting.
Another way to remove rust is by electrolysis, by connecting the rusted piece and another iron or steel object to the two poles of a battery charger and immersing them in water. The liquid electrolyte is simple -- baking soda or washing soda in water. To get an entire frame into the electrolyte solution, you might lay a sheet of polyethylene plastic on the floor inside a rectangular frame, or use a child's plastic wading pool (but keep children away! Electrolysis works faster than phosphoric acid, and is more practical if there is pitting. Links at the end of this article go to Web pages giving instructions. Reading into the last paragraph on one of those pages, I think that electrolysis is safe for brazing, though I'm not sure.
The phosphoric acid solution or electrolyte can be washed off with clean water. Very little rusting will result if the frame is dried quickly.
If a frame needs painting, chromed areas probably will have some pits and chips, with rust dots showing through. Using wadded aluminum foil avoids scratching chromed parts -- if that matters -- but usually, chrome is painted over, or redone in a fancy refinishing job. Phosphoric acid will undermine a pitted chrome-plated surface, but you could use phosphoric acid anyway if you are going to paint over the chrome. That will get rid of the rust under the chrome. The next step, abrasive blasting, will clean off loose chrome and roughen the surface of the chromed part so that paint will adhere to it.
I recommend derusting before blasting, because blasting will not remove rust down to the bottom of the deepest rust pits. Blasting will remove most residue of the derusting liquid. Both Naval Jelly and Purple Power do leave a residue, even if washed off with water..
We're refinishing a steel frame here. But let's discuss carbon fiber, aluminum and titanium for a moment.
Chemical paint remover and abrasives will do serious damage to a carbon fiber frame, and so the best you can so is to leave the original finish in place, and roughen it slightly so a new finish will adhere. Refinishing a carbon fiber frame is best left to professionals, from start to finish. Repair is also possible in some cases, by replacing damaged layers of carbon-fiber fabric -- also a job for professionals. On this site, Damon Rinard describes how he repaired a carbon-fiber frame he had already built.
Aluminum is much softer than steel, and so chemical paint removal is the preferred way to go with an aluminum frame. It has been reported that abrasive particles embed themselves in aluminum and spoil the finish. Aluminum also requires special preparation and primers. The best bet with aluminum is to send the frame out to a shop which specializes in stripping paint off aluminum, mostly using chemicals.
Titanium is often left unfinished, as it does not rust. Then painting is not an issue. Titanium is softer than steel, and any paint should be removed using chemical paint remover, as with aluminum.
Chemical paint removers are highly toxic. Chemical paint removal should preferably be performed in a professional shop environment with exhaust-air filtration. Once the finish has been softened, it can be cleaned off using water, solvents, or mild abrasives such as steel wool or a Scotchbrite™ pad.
It is common to clean paint off a steel frame using abrasives. Sandblasting is the generic term for this work, but sand does slightly erode steel tubing. Glass bead blasting is much gentler. Major cities have shops which do this work.
Before taking a frame in to a shop -- unless it is a shop experienced in work on bicycle frame -- you need to protect surfaces which you do not want to be abraded, or where you don't want particles to lodge. Thread old bottom-bracket cups partway into the bottom bracket and wrap them in tape, install an old headset, and block off ventilating holes with toothpicks. Duct tape is sturdy enough to resist blasting and keep abrasive particles out of the frame.
Bottom bracket masked for blasting (and already blasted):
duct tape wrapped around old bottom-bracket cup.

Also, either you or the shop needs to clean off oil, grease and deruster residues before blasting. Blasting may not entirely get rid of these and may propel them into pores in the metal. Derusters can be washed off with water. (The phosphoric acid leaves a rust-preventive coating which will withstand a rinse). A solvent cleaner works for grease and oil. If the frame has been waxed, a special cleaner such as PPG DX330 Wax and Grease Remover, Sherwin Williams R7K156 Solvent Cleaner, or DuPont 3919S Prep-Sol is recommended, because blasting can leave a wax residue in pores on the surface.
I took the tandem frame to a local metalwork shop, Fortune Metal Finishing. in Needham, Massachusetts. In the photo below, Sean, of Fortune Metal Finishing, holds the tandem frame following blasting. Now it is clean of paint.

Sean is holding the frame with his bare hand. Oils from his skin and other possible contaminants will need to be solvent-cleaned again before painting. A professional painter will do this, or you can do it using a solvent cleaner again.
Solvent cleaners and especially, grease and wax removers, are toxic and smelly. That is one reason you may want to hand over the refinishing job to professionals following the derusting.
Most household paints are now water-based. Thanks to advances in chemistry, their durability is acceptable -- but they are not suitable for painting bicycle frames.
Any solvent-based paint is going to be smelly, and to a greater or lesser degree unhealthful. Some are worse than others. Consider this carefully when choosing whether to solvent-clean and paint the frame yourself, and where to do your work. Your tolerance for smells is probably greater than that of your spouse, roommates or landlord. After all, you are gaining something from your work: a refurbished bicycle. They are only getting the smells!
Any finish for steel must start with a rust-preventive primer coat. This works like an electrical battery, but on a microscopic scale. One material gets eaten away as an electrical current passes between it and the other material when they are wet. If the two materials are zinc and steel, the zinc gets eaten away, protecting the steel. Primers contain zinc, which slowly gets eaten away.
"Acid etch" primer is popular now for use on auto body panels, and adheres especially well to steel, but it is not suitable alone under some paints. If used, it should be followed by the primer designed specifically for that paint.
A chip on the chainstay of my fixie. The center of the chip is exposed bare metal
and the gray area around it is primer, which has prevented rusting.
 .
.
The finish coat or coats prevent moisture from getting in, as much as possible -- but a finish coat alone will not prevent rust. Moisture will get in somehow, through a crack or scratch or chip, or by absorption, and without the primer, rust will spread under the paint.
A fine paint job won't last forever -- but with proper preparation, and primer under the finish coat(s), it should be good for many years.
The three common ways to apply a finish to a bicycle frame are to brush it on, spray it on, or powder-coat it. Consider how much you are willing to spend, how much the appearance of the frame matters to you, and how much work you will do yourself.
Finishes to be brushed or sprayed on are of three general kinds:
Whatever you do, you need to mask off places where you don't want the paint to go. The same masking you used for blasting will work for painting, except if the finish is to be baked on. Then the masking must be heatproof.
You can brush on enamels. Brushing is simpler, less messy and less of a health hazard than spraying, but generally doesn't produce great-looking results.
Sometimes that isn't what you want anyway. This is Sheldon's Robin Hood bicycle. His explanation: "Whenever I was around anybody who was using paint, I'd borrow the brush and dab a few splotches onto it, to deter thieves. I painted every part of it, except for the saddle." More about that bicycle...

Most enamels use a petroleum-based solvent and dry by evaporation, taking weeks to harden completely. Additional hardening occurs through chemical cross-linking, which builds bigger molecules. Baking can greatly speed the drying and hardening, but is not a practical choice for do-it-yourself work.
Marine epoxy enamel -- primer and topcoat -- can be purchased at boating supply stores. It largely avoids the drying issue, because it has two components which you mix together like epoxy glue. Most hardening occurs within a few hours through a chemical reaction.
A marine-epoxy enamel coating is thick -- so only a couple of coats are needed -- and very durable. If you brush it on, it can get very ugly because of its tendency to sag and drip. Ugliness is an advantage, though, where it deters thieves. Because you can apply the coating yourself, the cost is low.
Despite its low solvent content, marine-epoxy enamel is smelly and toxic enough that you should mix and apply it outdoors or in a detached shed or garage.
Some 30 years ago, I refinished three frames with brushed-on marine epoxy enamel. The paint sagged and dripped, and I caught a lot of flak from friends about my "drizzle-painted" frames. Two of those frames are still in use, without refinishing. The third frame was the Raleigh Twenty which I ride through Boston winters on salted roads. After some 20 years, I redid the marine epoxy following a frame repair. After another 10 years, I replaced the frame, because it had rusted from inside, as I showed earlier in this article.
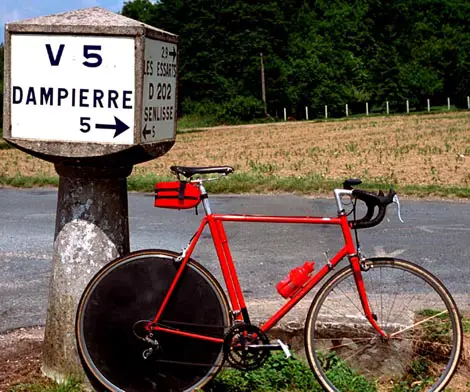
Here's my fixie, still ugly and rust-free, more than 30 years after getting the brushed-on marine epoxy treatment.

Spraying, followed by air drying or baking, is the traditional way to apply finish to a bicycle frame. It may be anything from "rattle can" work to auto body shop work, to very fancy artistic fades from a specialty bicycle refinishing shop.
With spraying, there is unavoidably overspray. Droplets of liquid paint are carried in the air. These are smelly and unhealthful.  There are even horror stories about workers who, with repeated paint spraying, coated the inside of their lungs until they could no longer breathe properly and had to use an oxygen tank.
For occasional, small jobs with the rattle can, you will probably get away with spraying outdoors with the wind blowing away from you, but if you use spray paint more than occasionally, you should wear a face mask -- preferably not just a simple fiber face mask, but a professional-grade respirator with dust and mist filters, activated charcoal elements and a one-way exhaust valve. The mask needs to form a tight seal against the face so that all the intake air comes through the filters.
Safety glasses or goggles are a good idea too: you don't want to get spray on your eyes, or eyeglasses. Professional painters use a ventilated spray booth with exhaust-air filtering, which also minimizes air pollution.
Sprayed enamel, followed by baking, is the traditional treatment for everything from new cars to refrigerators to bicycle frames.
A good spray-painted enamel finish requires several coats -- first, the rust-preventative primer, then color coats and often, a clear finish coat to add gloss. An auto body shop or professional bicycle frame shop can spray more efficiently than you can. The paint of choice for bicycle frames is Dupont Imron enamel. As, for example, with this frame which Sheldon built himself -- but he did not paint it himself like the Robin Hood.
Spraying two-part marine-epoxy enamel is not practical for do-it yourself work, because it requires specialized equipment and careful clean-up to avoid clogging. Because droplets of sprayed epoxy harden inside the lungs, it carries a high health risk. I suppose that you could take your frame to a boating contractor to spray on marine-epoxy enamel, for a better appearance, and to avoid the mess and exposure to chemicals, but I've not investigated this myself.
Powder coating has emerged over the past few decades, and uses an electrostatic charge -- like the one that makes a cat's hair stand on end when you pet it -- to attract particles of a powder to the object to be painted.
The powder is the consistency of flour.

The powder is sprayed on. The object being sprayed in the photo is part of a machine which processes silicon chips used in integrated circuits.

Oven-baking melts the powder into a smooth coating. In the photo below, Joe, of Coating Application Technologies, in Woburn, Massachusetts, USA, stands in that company's walk-in oven. He checked a thermometer on the side of the oven before opening the doors and walking in. It was only 150 degrees Fahrenheit (65 degrees Celsius). When in use, the temperature is 250 degrees Fahrenheit (121 degrees Celsius). He would have avoided walking in under those conditions.

If you are having a tandem bicycle frame powder-coated, you need to check that the oven is large enough. This one is.
Powder coating doesn't use solvents or leave liquid overspray, and so it is relatively environmentally friendly and clean. It produces a strong, smooth and durable coating. A "metallic" (glittery) coating is possible.
Bicycle fork with metallic (glitter) powder coat finish.
The steerer tube and brake bosses were masked before
application of the powder.

Because of the special equipment needed, powder coating is only practical in a professional setting. Nonetheless, it is economical compared with other professional coating techniques. Only two or three coats are needed to complete a job. The first coat is a rust-preventative primer.
Because of the baking, powder coating is not for a frame or fork which is partly or completely of carbon fiber, or which has chemically bonded parts. The frame or fork must be electrically conductive -- metal -- but heat-resistant filler compounds can conceal rust pits, ugly welds and the like. Masking must be heat-resistant -- no duct tape or masking tape -- and it is important to remove or block oil and grease residue inside a bicycle frame where it might liquefy and run out during baking, spoiling the finish. A good powder-coating shop will know how to address these issues.
Powder coating may be thermoplastic: it will melt again if reheated, or thermosetting: it will harden permanently when baked. Thermoplastic powder coating is especially touch-up friendly. Powder can be applied to only the area needing a touch up, and then it can be locally heated. The new powder will blend seamlessly into the surrounding area.
It is possible to recolor a powder-coated item by sanding it lightly and then spraying on a solvent-based paint which dries at room temperature. Recoloring with an additional powder coat is practical only after removing the original coat, because it would melt and mix with the new coat. Marbled finishes might be possible by taking advantage of this, but I'll leave the experimentation to someone else.
I had the tandem frame powder coated. Here's what it looked like when it was done. Nice job!

Prevention of internal rust is a good first step when reassembling a bicycle.  Old Raleigh three-speed frames with the dull, black finish had baked enamel inside and out, but few modern frames have internal protection against rust.
There is a commercial product intended to prevent rust inside bicycle frames: J. P. Weigle's Frame Saver. You spray it inside the bicycle's frame tubes, where it partially hardens, forming a sticky protective coating. A thin tube which attaches to the spray nozzle lets you work around corners and spray into ventilating holes, water-bottle bosses and the like.
I've had a couple of issues with Frame Saver. I couldn't figure out how to get at the  inside of all the tubes on some frames. Also, the coating left by Frame Saver is slippery enough that I had to tighten the seatpost clamp on one of my bicycles extra-hard, or the seatpost would slide down. But then, if you have used Frame Saver, you are unlikely to have a problem with a stuck seatpost.
Another product commonly used for rust prevention inside bicycle frames is Boeshield T9. This is advertised as a a protectant, but also a lubricant. It is sometimes used on bicycle chains. Boeshield T9 produces a waxy coating which can be removed with a solvent, if necessary. Inside a bicycle frame, a coating of Boeshield T9 will probably last for a few years, though it is not as tough as Frame Saver.
Avoid getting either of these products on surfaces which must take threadlock compound -- in particular, bottom-bracket threads, which are hard to clean off. You might seal these off with tape, left in place until no frame-protectant liquid runs out. Turning the frame over and over will spread the liquid around inside the tubes.
If the frame is ever baked again, T9 probably will liquefy, and Frame Saver may release vapor-- so it probably would be a good idea to have the frame baked before applying the finish to get that problem out of the way before it is baked again. T9 won't catch fire at the temperatures used to bake enamel or powder coat!
The seatstays and fork blades will usually have ventilating holes which prevented heat-expanded air from blowing out the brazing or welding when the bicycle was built.
Bicycle guru Jobst Brandt recommends closing these off, so water cannot enter through them. Good idea -- but do leave a drain hole under the bottom bracket. There's a link to Brandt's advice at the end of this article. He dismisses anti-rust coating the inside of the frame, but I disagree.
Now you're back to where you reinstall components on the bicycle. Procedures are described in other articles on this site. You need first to check whether paint is clogging any of the threads or bearing-race seats. If they were well-masked, this didn't happen, but it can happen. These problems can usually be addressed with a scraper (for the ends of the bottom-bracket shell, for example), or by threading a bolt through a bolt hole. If threads are seriously clogged, you might grind the end of the bolt so it works like a tap. Avoid filing away metal, especially on headset bearing-race seats.
![]()
Following the links for general information, I list Boston-area industrial metal cleaning and powder-coating businesses with which I am familiar, and a few highly-regarded shops in the USA which do bicycle refinishing and restoration. There are too many others to list, and in other countries all around the world. You could find them through a Web search.
More details about electrolysis
Klean Strip concrete and metal prep
Sherwin-Williams page about epoxy enamel
Another page about powder coating
Fortune Metal Finishing (Needham, Massachusetts, USA)
Coating Applications Technology (Woburn, Massachusetts, USA)
Spectrum Cycles (framebuilder Tom Kellogg, Pennsylvania, USA), fancy bicycle painting
Geekhouse Bikes -- bicycle builders who do fancy powder coating (Boston, Massachusetts, USA)